Game Design
Game Design
Video
Video
Graphics, Print, Illustration
Graphics, Print, Illustration


Subscribe
To receive email newsletters on upcoming UNCA events relating to technology and arts
Academic Partners


Animation Tutorials
Pre-Production Modeling Texturing Rigging Animating Post-Production
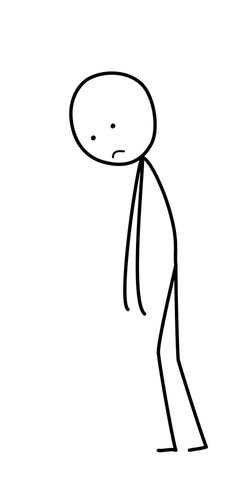
I can't draw, so how can I create a good storyboard?
Don't worry if your storyboard uses stick figures. Storyboards just need to convey the emotions of the scene and drive the narrative along. Focus on the direction of camera angles and include establishing shots and closeups. Try to aim for at least twenty panels. Professional storyboard artists generally spend about 20 minutes planning each panel and use very loose lines and greyscale shading. Don't get too attached to one idea. Be prepared to make revisions based on feedback.
RocketJump Film School: Intro to Storyboarding
Storyboarding tips by Rob Coo
Inside Sony Pictures Animation - Storyboard Artist Patrick Harpin
Academy Originals/Creative Spark: Jennifer Yuh Nelson
Academy Originals/Creative Spark: Brenda Chapman
Francis Glebas: Former Disney Animator, Drawing Tips and Tricks

Story
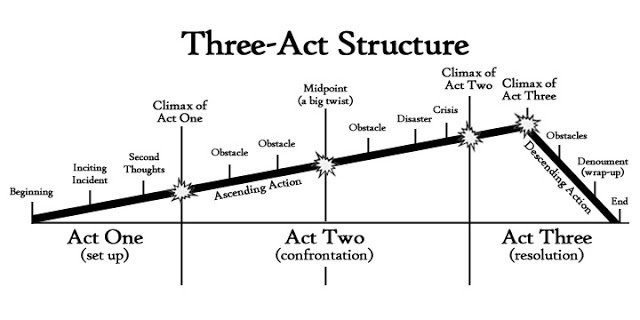
Don't try telling a grand epic story full of worldbuilding in your first animated short. You won't have time to design, model, texture, rig, light, animate, and edit all that stuff in a semester. It takes teams of people months or even years to produce those kinds of animations. At UNCA, you only have a few weeks; at best, a little over a month. Keep it simple.
Create a relatable protagonist or antagonist, and then take that character on a short journey where they experience some form of aspiration (thesis), conflict (antithesis), and resolution (synthesis). Like everything else, it's possible to mangle the three-act structure, but if done correctly it's your best bet for creating a successful animation.
Pixar's 22 Rules of Storytelling by Emma Coats
TV Tropes: Show Don't Tell
NoFilmSchool: Elements of Storytelling That Will Help You Write Emotionally Dynamic Scripts
Iskander Krayenbosch: The Hero's Journey
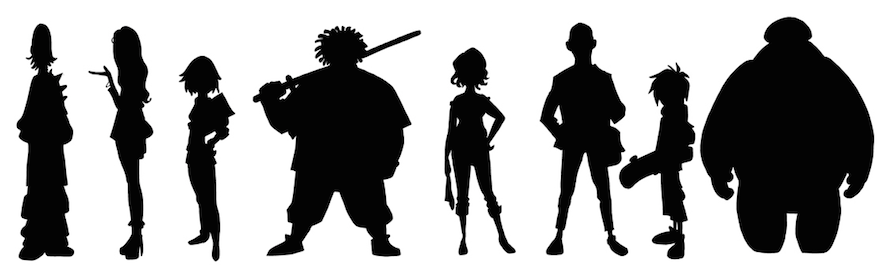
Thumbnail Silhouettes, Expression sheets, Character studies
Designing characters and scenes may seem relatively straightforward, but professionally it is a much more complicated process. Animation studios go through thousands of concepts before they finalize the look of the film shown in theaters.
Making a lot of quick sketches will allow you to get some ideas on paper so you can move on to the main production process. Getting distinctive shapes and dynamic silhouettes should come before adding fine details. Professional concept artists typically spend anywhere from 5 to 20 minutes on their silhouettes, and about the same time for storyboard panels. The most time is spent on the last phase putting details into the final character turnaround, which is used as a reference model sheet for 2D animators. 3D animators sometimes base 3D models off of maquette sculpts, but turnarounds and expression sheets are still more versatile
Traditional Animation: Model Sheet Library
Jordan Madere: Silhouette Thumbnails
Character Design Notes: Character Model Sheets
Fairytalenewsblog: Early Disney Concept Art
Buzzfeed: Pixar Concept Art
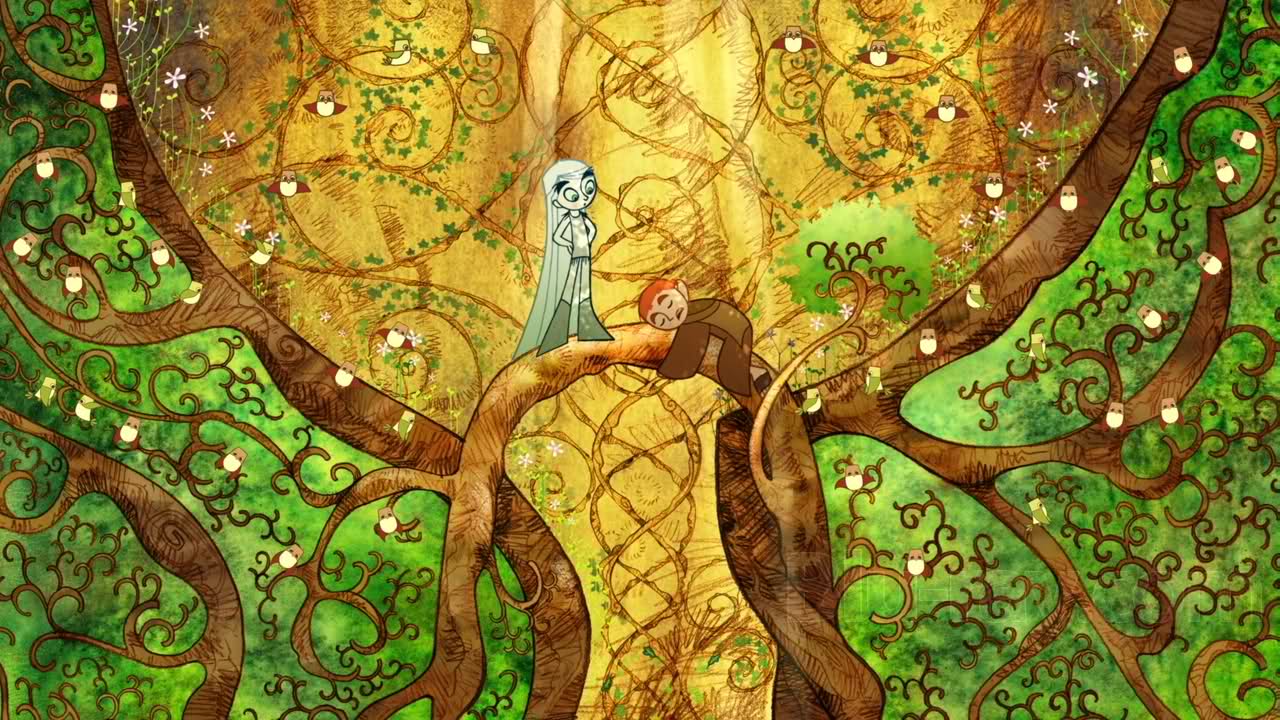
Art Style
When creating an animated short, it is important to consider the tone and art style of the story. Your first animation probably won't be the best animation you ever make, but the project can be salvaged for your portfolio if at least a few rendered screenshots look nice. Even though the majority of the animation industry is dominated by 3D software, many studios are more interested in seeing student projects that are unique or technically accomplished.
A word of warning is that realism takes a lot of modeling, texturing, lighting, and rendering time. Most scenes and rigged characters take months of refinement before they look as good as examples online. Anyone able to speed model has had lots of practice. In the time constraints given to New Media students, it is unfortunately advisable to find a compromise between the quality you want and what you have time to finish. Use any cheats possible to save time so you can focus all effort on the aspect you are most interested in, whether it be story, character design, environments, animation, etc. If you're going to put a lot of work into a project, you might as well create something you can be somewhat happy with.
2D animation is not given much emphasis at UNCA, but if you can sketch a design, the drawings can be translated to 3D. Toon shading renders much faster and creates a flat cartoonish look similar to cel shading. Other stylistic effects can be achieved through camera angles and lighting, while texture overlays can be created in other programs like Photoshop and After Effects.
Edge CGI 3D: How to Create a Toon Shader
Animatics and Blocking
Animation takes a lot of time, and it isn't cost effective to have to do reshoots. For this reason, the story needs to be solidified before any modeling ever takes place. Top animation studios create a color script that serves as a scene by scene breakdown of the entire movie. Most studios just use a script or storyboard.
From the storyboard, an animatic is created. This can be done in 2D with limited animation reels, or 3D blocking. A 3D animatic is probably more time-efficient. The first animatic rough pass won't have textures, lighting, or facial animation, and it will look absolutely horrendous. It takes multiple passes to create an animation that looks decent.
Ratatouille: Progression Reel
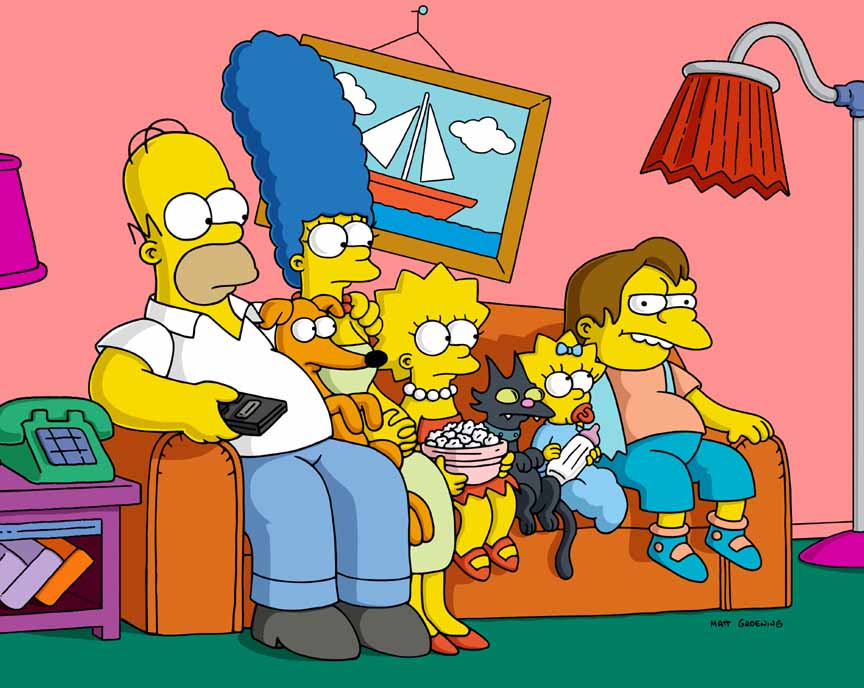
Limited Animation
Animation is very time consuming work, so animators have to be smart about how they use their resources and cheat whenever possible. Television cartoons and most 2D animation productions use limited animation. This method is intended to save time and costs. Scenes and animation cycles are often reused. Closeups, dialogue, establishing shots, editing cuts, static action, and still frames can all cut down the amount of work for the animator. The more action, characters, and moving parts in a scene, the more time it will take to animate.
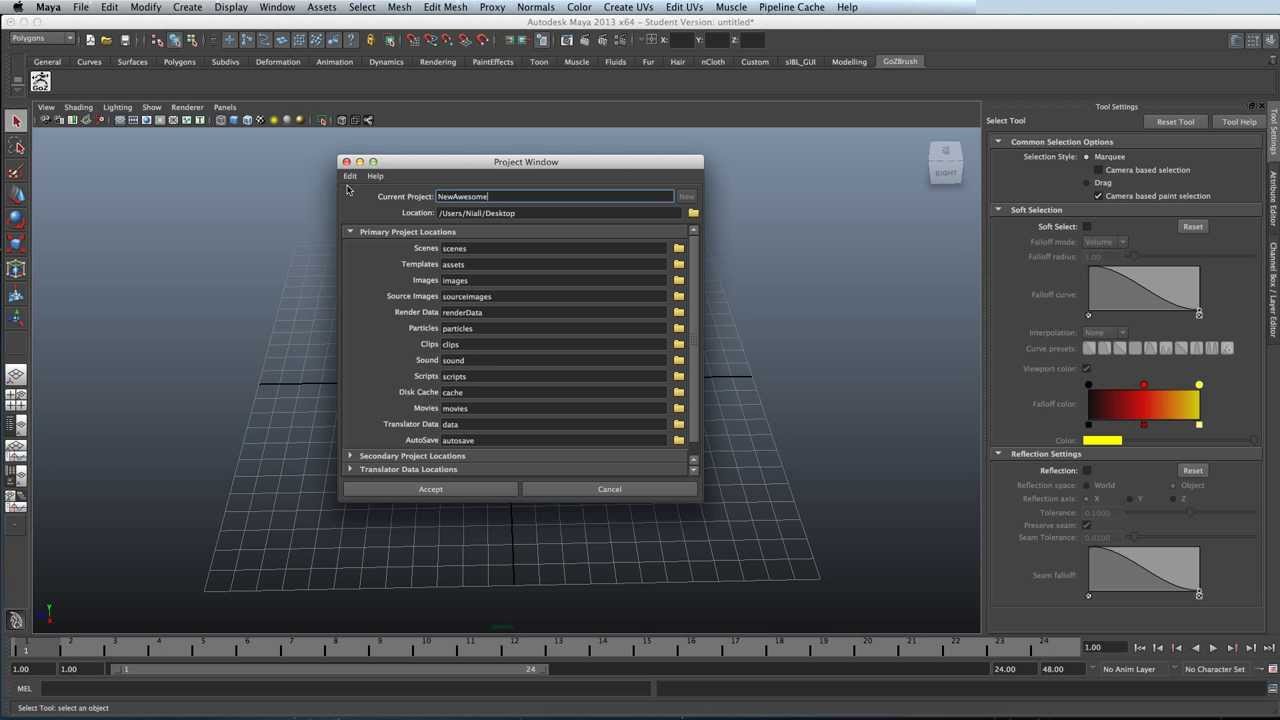
Set Project
This is the first thing you should do when you open Maya. Setting a project ensures all related files get put into the same Maya folder. Use Increment and Save to save multiple backup files as you progress.
World of Level Design: How to Set Up a New Project
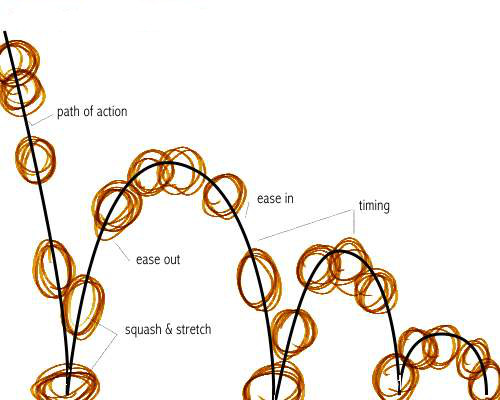
The Bouncing Ball Project
A solemn rite of passage for beginner animators, the bouncing ball project is meant to test your ability to exaggerate performance and motion using squash and stretch. Learn to use the Graph Editor to smooth out animation curves. Timing is difficult to master, so it is essential to plan out every frame so that the motion is not too fast or too slow.
Angryanimator: Bouncing Ball Tutorial
MegaBcoyle: Graph Editor
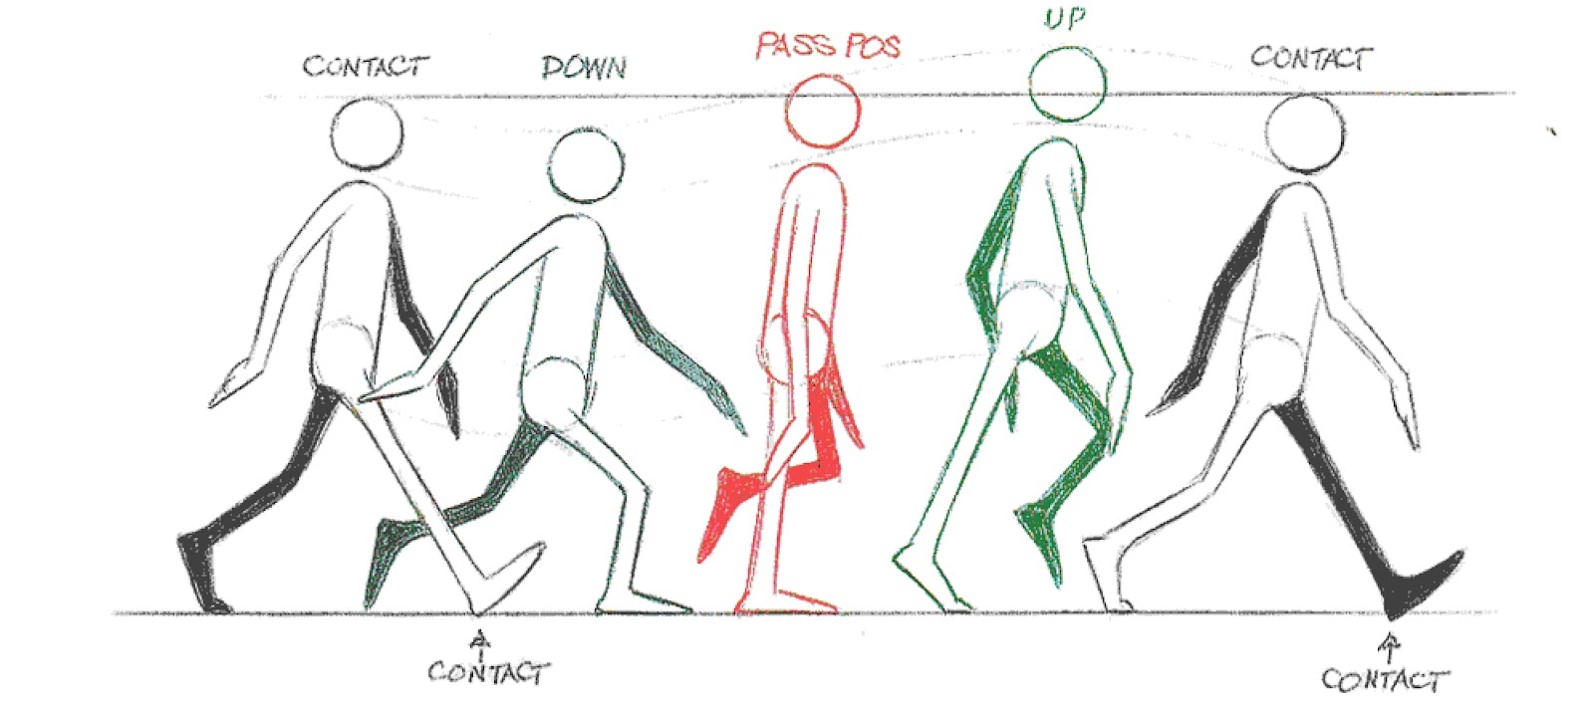
Walk Cycles
Walk cycles are essential to your demo reel, since a good walk cycle displays understanding of observation, timing, and weight. Use reference footage to achieve the best results.
101 Dalmations- Dog Walking Look Alikes
Monty Python's Ministry of Silly Walks- What not to do with your walk cycle
YouTube: Walk Cycle References
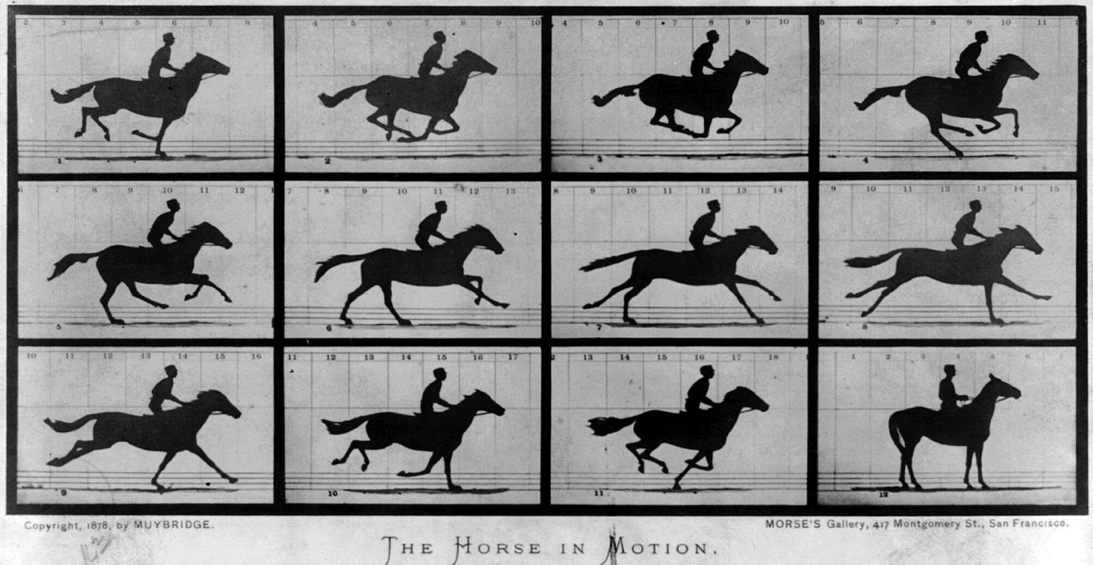
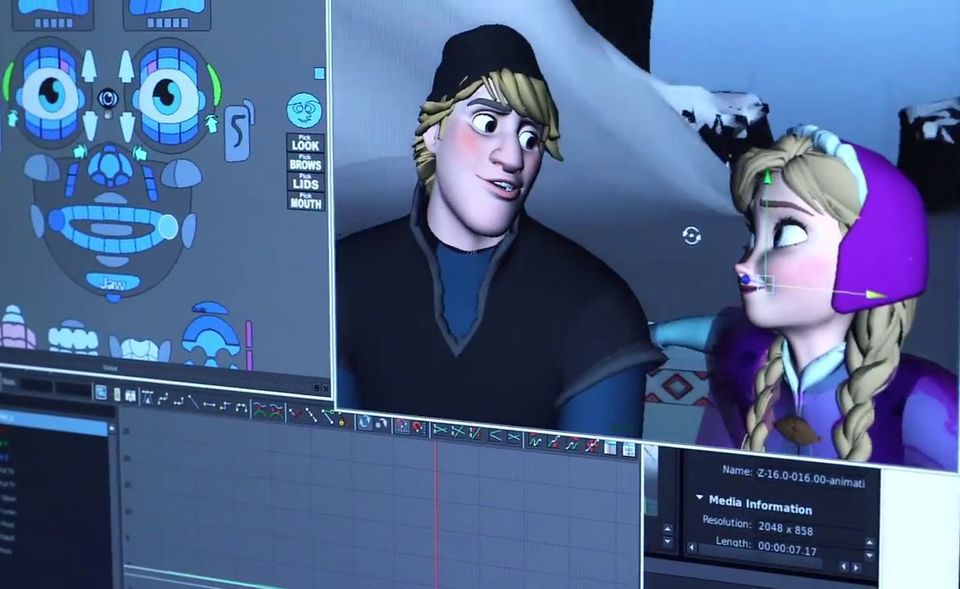
Reference Footage, Image Planes, and Mirroring
Reference footage is used to help provide visual cues during the animation process. Footage can be broken down frame by frame to provide a convenient guide to how motion really looks. Trying to animate without reference actually takes longer and generally ends up looking slightly off because you are trying to replicate movements and expressions from memory, which isn't as accurate as seeing the real thing. To find sources for live reference, look online, ask a friend, or go record yourself performing the action you are trying to animate. Mirrors are great for facial animation.
Reference images can be set up on the coordinate planes in Maya to allow the modeler to quickly sculpt a 3D form simply by tracing outlines. It is recommended to only model half of the geometry, and then mirror the other half. This method saves a lot of time. Footage can also be projected onto planes to rotoscope or serve as a background.
CGI Animation Breakdowns HD: Walt Disney's "Frozen" Shot progression - by Bobby Pontillas
Sleeping Beauty - Live Action Dance Reference
Joy Horvath: Setting up image planes in Maya
MDanimator: How to Import Video Reference directly to Maya using Quicktime Pro
3DEX: How to Mirror Objects
I've spent hours on this project, and my animation still looks terrible
Break down the workload into smaller segments and gradually refine each section in multiple steps. Begin with rough position blocking, add more details, and end by adding the final polishing touches.
Don't forget to memorize the 12 principles of animation and go through the checklist when you are animating to improve your results. Floaty movements are the result of not showing proper weight or gravity. Jerky movements or slow motion action usually are the result of not having the right timing between keyframes.
Create strong silhouettes for key poses. Exaggeration can enhance the effect.
Most importantly, try to put yourself in the shoes of the character you are trying to animate. Make them seem like they are thinking and reacting like a real person would. In the industry, professional voice actors are a huge influence on the characterization of the animated characters they portray, but it is ultimately the animator's job to add in subtle details and exaggeration to bring the performance to another level.
Bloop Animation: The 6 Steps of Animation
The Lion King: The Making of a Walt Disney Masterpiece
Walt Disney Recycled Animation Scenes
Rare Behind the Scenes Photos of Disney Classics
The Emperor's New Groove Behind The Voices
Cel-Painting
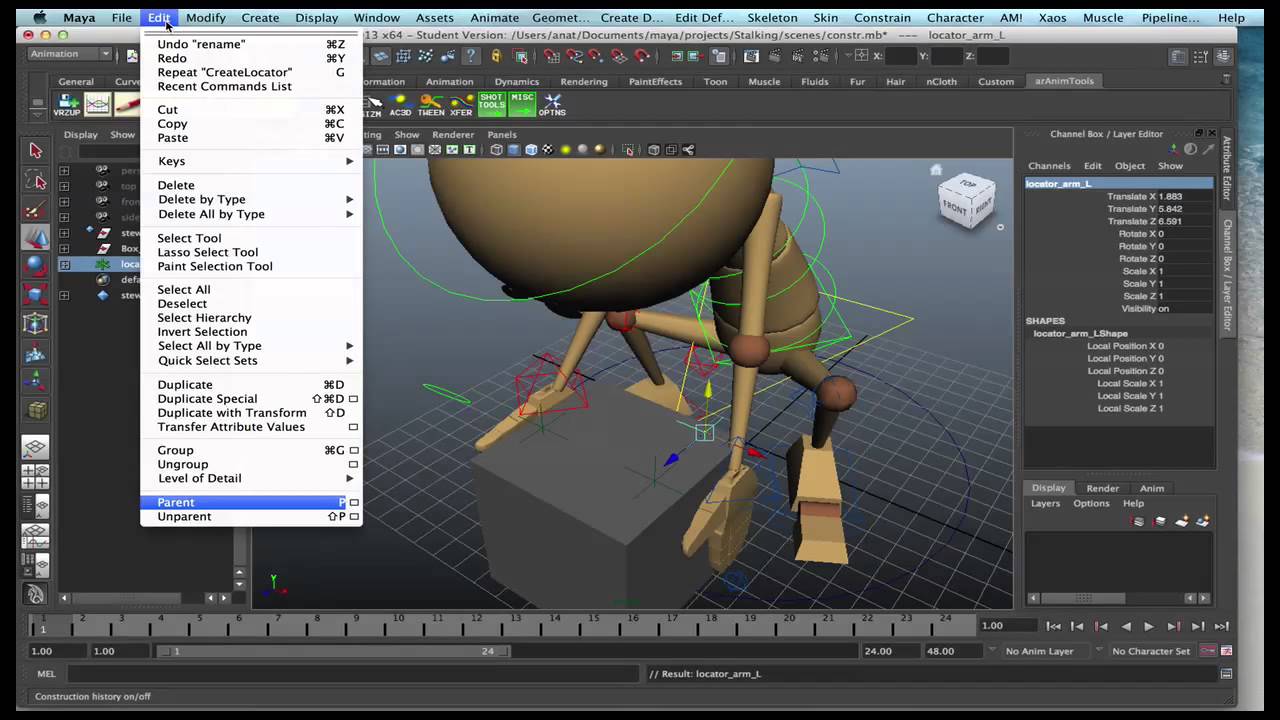
Parenting, Grouping, and Constraints
Grouping objects will allow moving or scaling a number of components all at once, while parenting groups of objects adds an extra feature that controls all the child nodes. Constraints are one of those things that seem so simple in principle, yet can be a complete nightmare to do correctly. Constraints are typically used to temporarily pick up an object or attach an item to a rigged model.
MegaBcoyle: Picking up an object
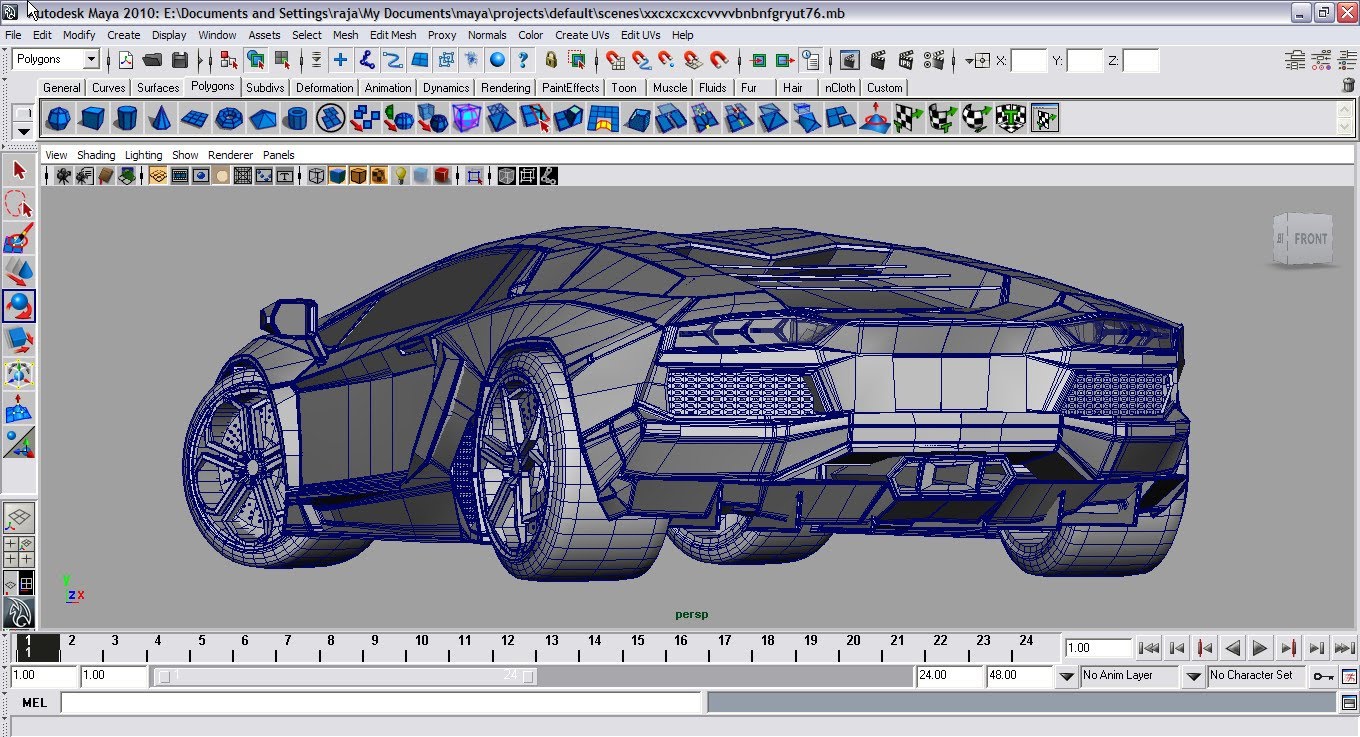
Modeling
Modeling can be done a few different ways. The easier method is to combine separate pieces together. The more advanced method models one object out of a single mesh. A single mesh is preferred by professionals for anything that will be rigged or textured, namely soft body character rigging. Combining parts works for most everything else as long as the geometries are tangent and the joining seams can be concealed. There are ways to combine separate pieces into a single mesh, which is usually best to do once a model has been finalized and is ready for texture mapping.
The polygon count of a model factors in to the render time, so don't go overboard with the complexity of a model and try to use only as many geometry as you need. The more polygon faces a mesh has, the more memory it takes up and the harder it is to edit. Undesirable sharp edges can be smoothed out to appear more organic using the smooth mesh preview mode.
Extrude Tool
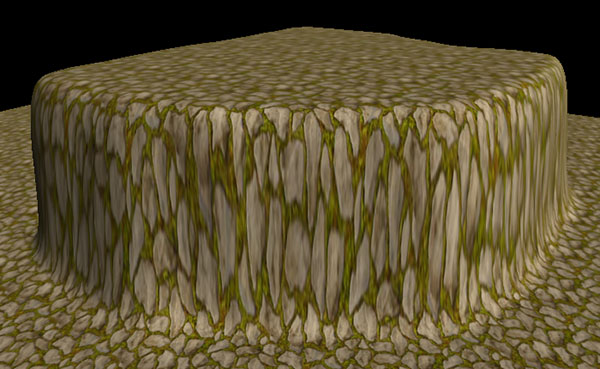
Texture is stretched or tiled on 3D model
First, double check that the source image has decent resolution relative to the surface area covered. For a quick fix on flat surfaces, select the face and go to the Create UVs menu section in the Polygons menu and select planar mapping. Controls will appear, allowing you to adjust the texture. Once you figure out how to use the planar mapping tool, automatic mapping, cylindrical mapping, and spherical mapping are all fairly self-explanatory. However, for more complex geometry, you will need to use a different tool, the UV Texture Editor.
Becky Kinkead: How to Make a Seamless Texture in Photoshop
3DMotive: Diffuse, Specularity, Bump Maps
Mike Hermes: Planar UV Mapping, Bump Maps
Online Media Tutor: Vertex and Pixel Shaders
Edge CGI-3D: Toon Shaders
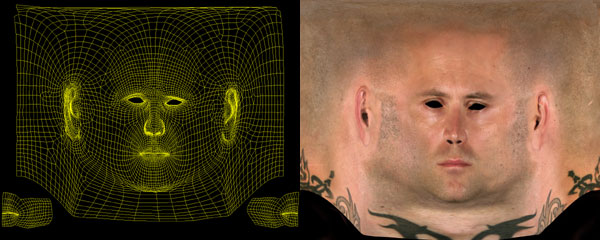
UV Texture Mapping
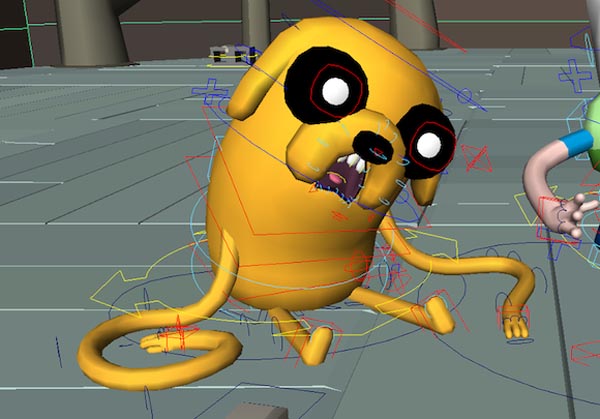
That creepy squashed face thing is the work of the UV Texture Editor. In order to get textures to appear without distortion on a 3d surface, it requires mapping the surface area geometry and flattening it on a 2D plane. Exporting a UV snapshot will allow you to use Photoshop to paint directly on the map and import it back into Maya. Usually you will have to select faces individually and then join the UVs into distinct shapes that will be easier to work with in Photoshop. It's a tedious process, but it is essential for customizing character models and complex models.
James Taylor: UV Unwrapping
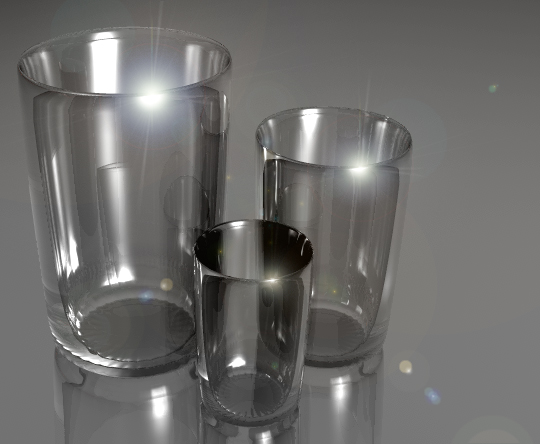
Rendering is taking forever, and this project is due tomorrow
This might happen if your scene has a ton of geometry or polygons, or if the lighting is bouncing off glass or reflective materials. The more complex the scene, the longer it takes Maya to calculate. Delete what extra geometry you don't need, delete anything that isn't seen in the camera frame, and scale back the reflective textures or mia materials. Playblast only as a last resort to turn something in.
From a technical standpoint, the graphics card, processor speed, and number of cores are the primary hardware factors in how fast a computer will render, so it is generally recommended that animation students use the most powerful computer they can get access to. If you only have a laptop with a measly single core and a 1.0 processor speed, set up a render farm in the labs by rendering on multiple computers at once. Another thing to be aware of is that some newer model Macs are not equipped with powerful nVidia graphics processing units and instead use a different system of integrated and discrete graphics processing. This is apparently a measure to extend battery life, reduce heat, and make a slimmer computer case. Computer settings can generally be reviewed in the control panel or in Finder.
Lynda.com: How to use Render layers
Online Media Tutor: What is Rendering? | Rasterization, Ray Tracing, Radiosity
James Taylor: Physical Sun and Sky
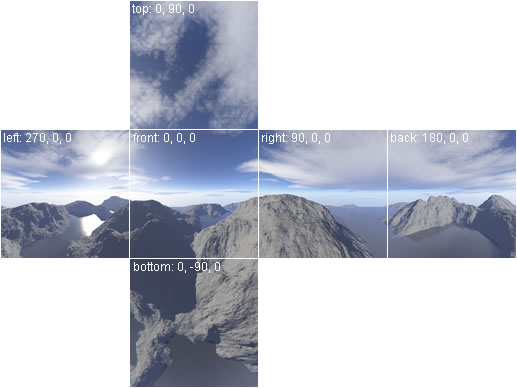
Skyboxes
Skydomes or skyboxes are used as a surface to project background textures for the sky environment. There are advantages and disadvantages to both. A skybox cube has less vertices than a sphere and takes very little time to set up, but can show texture seams along edges and corners. The biggest downside to skyboxes is that they work best with static textures. With video games especially leaning towards verisimilitude, animated day-night cycles and randomly occuring weather cycles are becoming a common practice. Spherical skydomes are a little easier to show moving clouds and transitions for times of day, but the textures can take some extra tweaking to apply.
Turntables
Here's a very useful tutorial by Professor Oakley showing how to get a camera to rotate around your model. This is good for showing off details on models, characters, and scenes. It only works properly if the model is centered around the origin of the ground plane (0,0,0).
MegaBCoyle: Attaching a camera to a curve in Maya
Mannequin rig joints aren't working
Check to make sure none of the joints have been rotated over 360 degrees. Also make sure the ik handles for the knees and elbows are placed out far enough. If controls are having no effect on the model, then the rig may have become detached and broken, and you may need to revert back to a previous save. Check that there are not any set keys on the master control.
Jason Baskin: Rigging an IK Spline Back
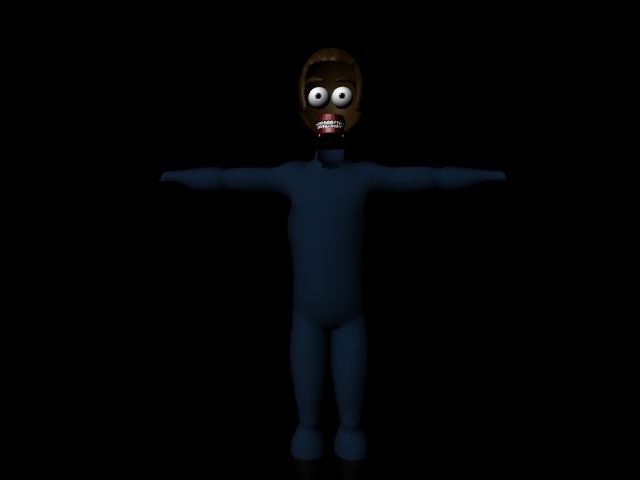
I downloaded a character rig from the internet, and it isn't working out very well
Every rig is different and has weird quirks. You'll have to do some experimenting to get the hang of things. It's recommended to not try downloading a rig you have never used before to use for your final project, since if anything goes wrong, you're kind of screwed. Here's how to fix the creepy missing skin texture issue with Josh Burton's Morpheus Rig.
Morpheus Notes.PDF by Lara Fetto
Rigging and Binding Skin
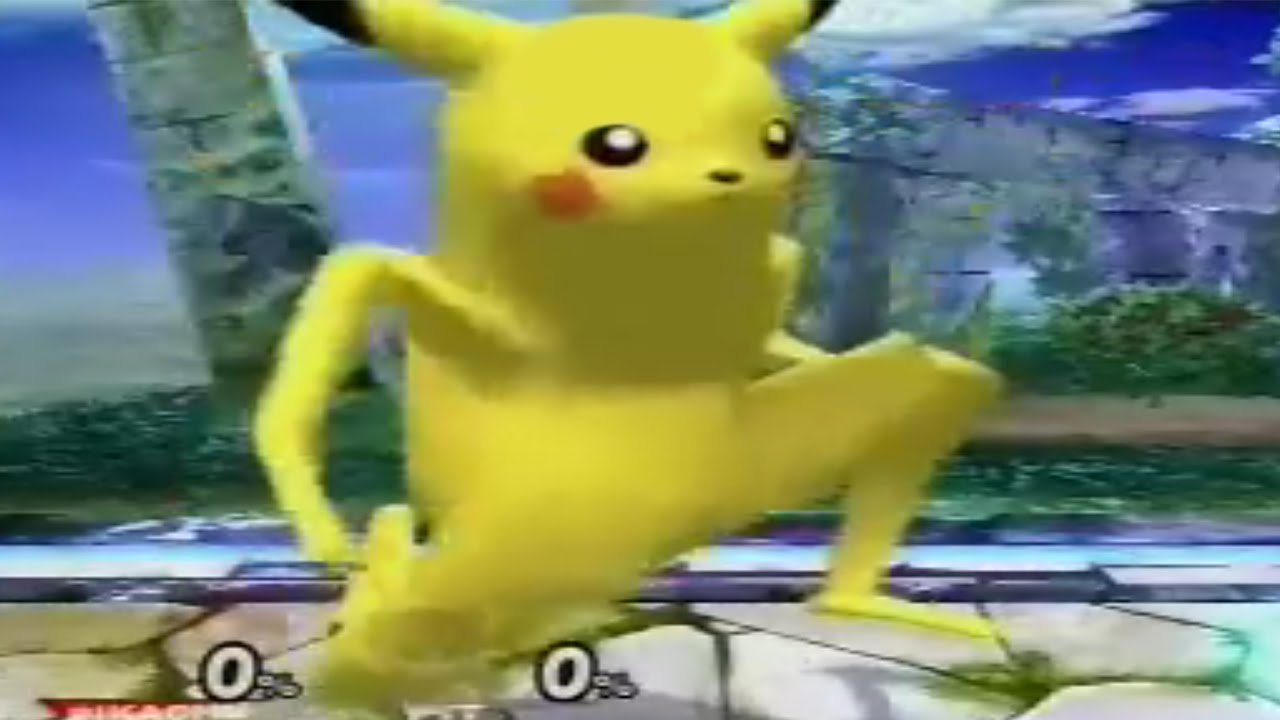
If your rigged character model starts doing freaky stuff, it is probably due to a problem with the joint rotation, constraints, or the bound skin. Unbind the skin and try using a different binding method. If a soft body model is deforming in weird areas, the skin probably needs weight painting.
DevDennis: Painting Weights
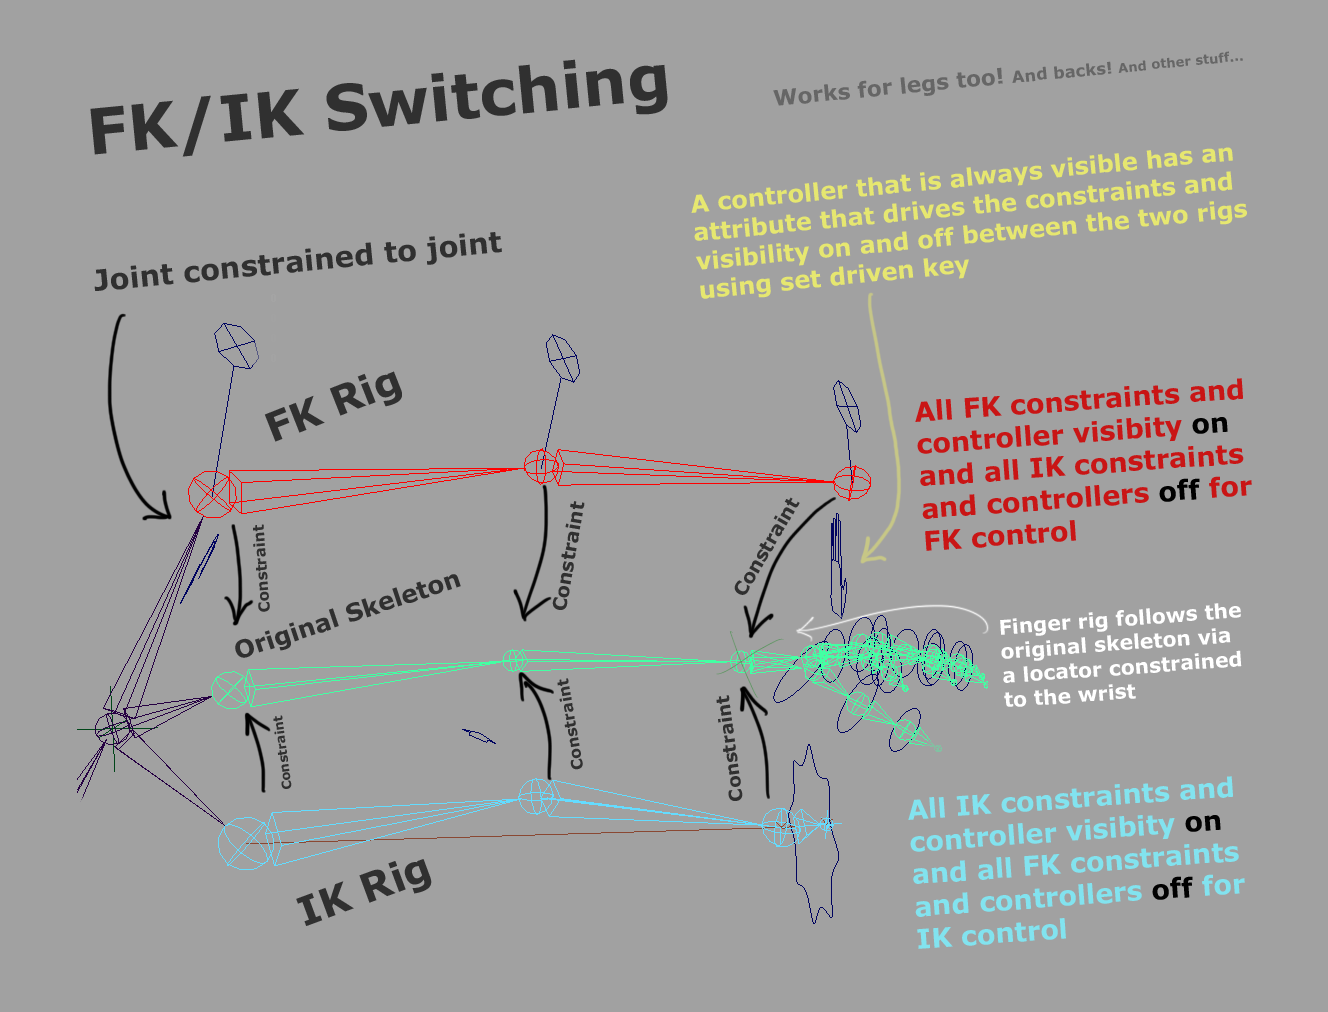
IK/FK
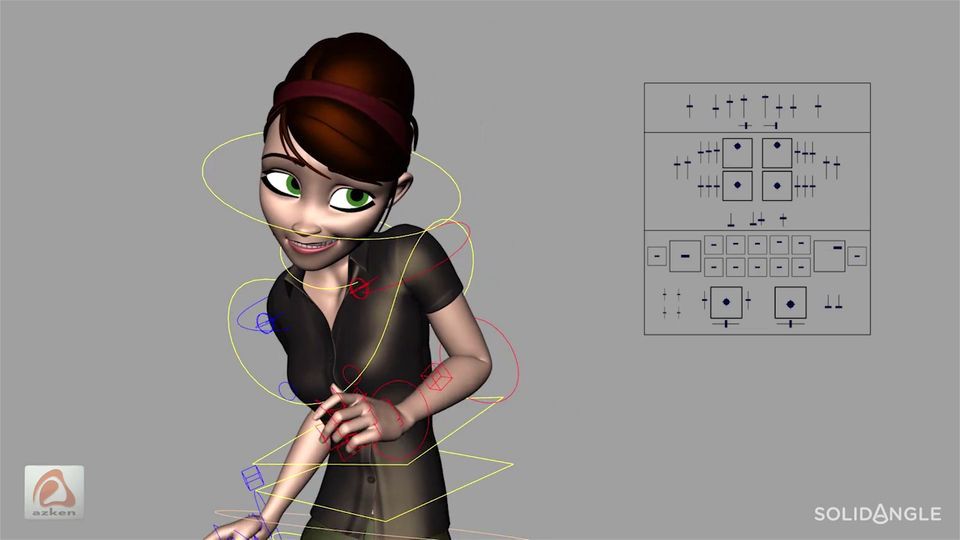
Inverse Kinematics and Forward Kinematics are two different setups for rigging controls that sound a lot more complicated than they really are. In a 3 point joint system, an FK setup would have a control handle constrained to every joint, so that each section can be moved separately. This allows precise control, but can be tedious for the animator to adjust for every set key. FK is generally used for arms, and can be setup to switch with IK when needed.
For a three segment joint chain, IK handles are applied to the base and opposite end joint. When the end joint control is moved, the center joint will bend automatically in a certain direction. The center joint position doesn't always end up where you want it to be, so it can be adjusted with a pole vector constraint. IK is generally used for legs.
Murphy Randle: The difference between FK and IK
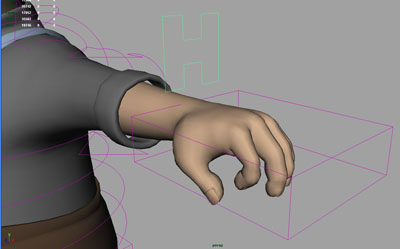
How do I animate making a fist
Try this! Set Driven Keys for Hand Rigging.
UnityChat: Using Set Driven Keys to Animate Fingers
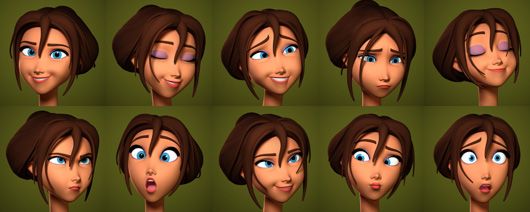
Facial Expressions
Instead of trying to animate each facial control independently, use blend shapes to quickly transition between preset expressions. The eyes and eyebrows can be the most expressive parts of the face if animated properly. Drawing sketches or expression model sheets may be helpful in getting your character to react more believably.
The Technology Behind How to Train Your Dragon 2
AnimSchool Animation Student Showcase Fall 2013
Jason Baskin: Blend Shape Overview in Maya
Jennifer Conly: Blendshape Heads
Jane Facial Rig by Eyad Hussein
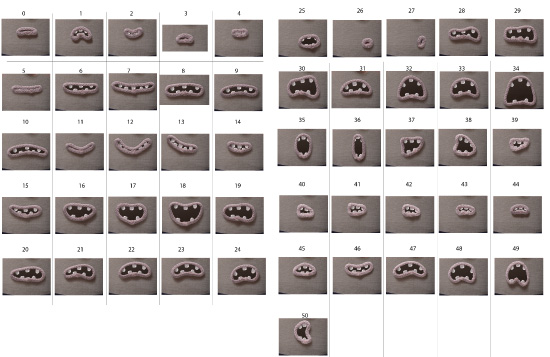
Dialogue
Dialogue has to be carefully matched to certain mouth shapes used to pronounce syllables. Phoneme mouth charts or recordings of an actor speaking can be used for reference. It is always recommended to ensure the dialogue or soundtrack is completely set before animating, since it is impractical to have to go back and redo lines. Exposure sheets are used in the industry to break down when every syllable happens.
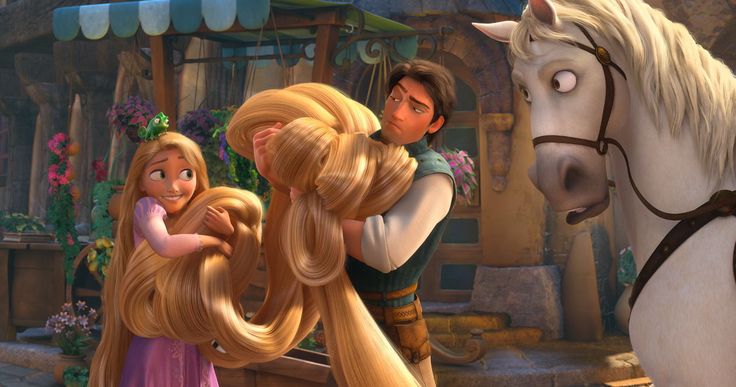
Hair and Fur
Toy Story and Bug's Life used plastic toys and insects because the bodies were mostly solid forms, which would be easier to model and animate than humans. Monster's Inc was the first Pixar movie to attempt realistic hair. Sulley had 2,320,413 individual strands, a large portion of which had to be animated by hand in order to create the simulation program that would be used throughout the movie. In Monster's Universtity, the number of hairs on Sulley alone doubled to 5,475,458, with an entire simulation program built from scratch. In the Incredibles, the most technically challenging aspect of the entire production was Violet's hair. The character model was bald throughout most of the production because the technology to create hair didn't exist at the time, though the physics were believed theoretically possible. The advancements in hair simulation for Brave and Disney's Zootopia are just as insane.
The moral of the story is that animators probably want to avoid fur and hair in their projects. Unless you really want to become a rendering artist/software engineer, it would probably take an entire semester just to start building a prototype hair simulation program.
Venture Beat: Creating a creature with 5.5M pieces of animated hair in Pixar’s Monsters University
Cartoon Brew: Who Does What On A CGI Character: The Many Makers of Elliot in ‘Pete’s Dragon’
CNET: Bravely going where Pixar animation tech has never gone
Slashfilm: A Look at Pixar and LucasFilm’s Renderfarms
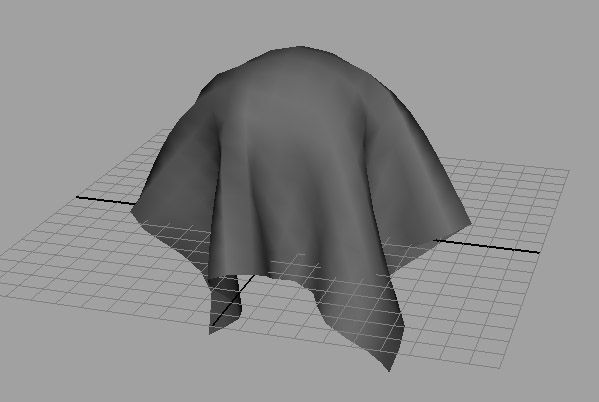
Cloth
Like hair, cloth is an advanced technique that will cause you a world of hurt if you attempt to mess with it. Fabric simulation programs like nCloth will imitate basic drapery physics for a number of different materials, but animators still have to go back in and make adjustments by hand to get the right movement. One animator for Rocksteady's Arkham game series ended up spending 2 years doing nothing else besides animating Batman’s cape movements.
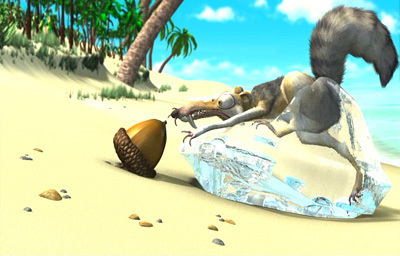
20th Century Fox/Blue Sky Studios
Maya is frozen, and I can't escapeForce quit by clicking on the Maya program tab at the bottom. If Maya keeps crashing continuously, you may have an issue with your scene or graphics card.
Advanced Tutorials- Hopefully Coming Soon
3D Animation
Graph Editor
Skydomes/Skyboxes
Hide objects/ work in layers
Hypershade Editor
Split Faces Tool
Freeze Transformations
Twinning
Gimbal Lock
Reverse Foot
Displacement Maps
Skinning, baking, weight painting
Pose to Pose
Motion Blur
Advanced Rendering/Mental Ray
Subsurface Scattering
Ray Tracing
nCloth
Substances
HDRI
UV Texture Editor